
Sign Up for Our Newsletter to get the best discounts and offers
(Fall Bulb Planting & Care)

Tip toe through the Tulips, dilly-dally in the Daffodils, fraternize with the Fritillarias, take a hiatus in the hyacinths, snooze in the snowdrops, cruise through the crocus, be at peace in the Alliums…hmmm…I know I forgot one…oh, and idle in the Iris. Doesn’t all of that sound so nice and relaxing?! A little corny, I know, but nonetheless, relaxing. In the spring, this could be you but only if you do some work now. Yes, folks, you need to get your hands a little dirty this fall for lots of enjoyment this spring.
We have a bevy of beautiful bulb choices and we are so close to perfect bulb planting weather. Typically when nighttime temperatures dip down consistently between 40 and 50 degrees, it is bulb planting time. Let’s get going!
*Pick out your favorite bulbs. One of each, right?! It is just so hard to choose.
*It is still a little warm so tuck your bulbs into the refrigerator for a couple of weeks. Yes folks, the refrigerator. Not right next to the fruit. Fruit releases rotting gasses. Ew. The cold refrigerator will help the bulbs harden off and withstand winter better.
*When night temperatures dip into the 40’s now it’s time to plant. Yay!
*Get a good bag of soil like Van Wilgen’s Premium Planting Mix or some compost. Most bulbs like the soil rich. Alliums might be the exception.
*Mix Bulb-Tone or Bone Meal into each planting hole. Use an inorganic fertilizer like Van Wilgen’s Slow Release, if animals digging up your bulbs is an issue.
*Dig a hole that is 3X’s deeper than the height of the bulb. i.e. If the bulb is 2 inches high, dig a hole that is 6 inches deep. This will ensure that the soil is loose enough for healthy root development.
*Plant bulbs 2X’s deeper than the height of the bulb. i.e. If the bulb is 2 inches high, plant it 4 inches deep.
*If squirrels, voles, and chipmunks are an issue, add some deterrents. Perma-Till/Volebloc is a course material that permanently discourages these critters. I Must Garden’s Mole & Vole Repellent is really helpful mixed into the soil with the bulbs.
*Water. One time a week is usually sufficient for bulbs.
*Take a winter’s nap.
*Be patient.
In the spring you will be excited to see the beautiful metamorphosis of your bulbs into beautiful flowers! For now, happy fall planting.
Come see us at Van Wilgen’s. We would love to help!
IF ONLY TREES & SHRUBS COULD TALK TO US,
WE COULD LEARN SO MUCH MORE!
If only trees & shrubs could talk to us. Oh, the things they would tell us! They could let us know when they need some water when they have had too much to drink, if an insect or disease is bothering them, and especially if they are hungry. We could be much better caregivers to our natural friends if only they could speak to us. Ah, but they do. They let us know when they are happy by becoming big, full, lush, and colorful. They also communicate their aches and pains to us through stunted growth, yellowing leaves, oozing sap, and so many other ways. If we pay close attention, we actually might be able to hear what they are saying. But, sometimes we just can’t! A lot of gardening is just trial and error. It’s often about just going for it, experimenting, and seeing what works.
If you know me, then by now, you know I am a huge fan of fertilizing trees and shrubs. Some might even say I am a fertilizer pusher! It is only because I want what is best for your plants. If trees & shrubs could speak or even yell at us, they might shout…”Gimme some food!” Everyone in the plant world knows that early spring and spring are excellent times to give your trees & shrubs a healthy dose of fertilizer but do we all realize how truly important it is to fertilize them in the fall? I KNEW IT WAS IMPORTANT BUT NOT NEARLY AS MUCH AS I THOUGHT! I learn new things every day.
I always knew that it was important to give our trees & shrubs a half dose of fertilizer in the fall to help them recover from the heat and drought stress of summer. I also knew that the reason we suggested feeding them at ½ the amount we do in the spring is to promote recovery but not encourage too much new growth before winter. We always thought that fertilizing our trees & shrubs late in the fall would make it so they could not harden off and get damaged from winter weather. WELL GUESS WHAT GUYS? THIS IS NOT EXACTLY TRUE ANYMORE!
The new truth is that we can fertilize trees & shrubs late into the fall. We can fertilize them a full month after the first killing frost. We can fertilize them after all the leaves have fallen off the trees. Yes, guys, this is the new thing I learned and wanted to pass onto you. Logically, this makes so much sense. I have been encouraging customers to put down Fall Lawn Food after their last mow of the season for years, why not trees & shrubs too! The rationale is…trees & shrubs significantly slow growth in late fall. After they lose their leaves, they have practically stopped growing up top for the year, but they do not stop growing down below. It is not only okay but it is great to give trees and shrubs the right fertilizer late in the fall. The food you give them at this time will just promote wonderful, deep root growth and store itself inside the root system so it is immediately available to the plant right away in the spring. How cool is that you guys!
So, here I go again, pushing fertilizer on you. We learn new things every day. Fall fertilizer for trees & shrubs is more important than we ever imagined. So go for it! Your plants are talking to you. Listen.
Come see us at Van Wilgen’s. We would love to help!
SHOPPING LIST:
*Espoma Tree-Tone
*Espoma Holly-Tone
*Espoma Plant –Tone
*Van Wilgen’s Control Release
Caring for your hydrangea can make all the difference for next year’s blooms. Hydrangea’s are strong and can come back from almost anything when given enough time and proper care.
Just follow these fall tips for pruning and maintenance. It isn’t complicated.
Identify
It is important to identify your variety first because some hydrangea varieties do not like being pruned in the fall.
If your garden has hydrangeas, then you need to know that there are two types of hydrangeas. One type produces flower buds on old wood and the other produces flower buds on new wood. Stems are called old wood if they have been on the plant since the summer before. New wood are stems that develop in the current season. Most varieties found in gardens are old wood bloomers including Mophead, Big Leaf, Lacecap, and Oakleaf hydrangeas. Double check your variety with your local garden center.
When to Prune
Hydrangeas can grow for years without being pruned, but if they get unruly, over take an area of the garden or lose their growing capabilities – it is time to trim. But when to prune them?
Prune fall blooming hydrangeas, or old wood bloomers, after they bloom in the summer. If you prune old wooded hydrangeas in fall, you are cutting off next seasons blooms.
Summer blooming hydrangeas, or those that bloom on new wood, are pruned in the fall, after they stop blooming.
Hydrangeas are colorful and vibrant in the early season, but are hard to preserve after being cut. They are easier to care for after they start drying on the bush.
How to Prune
Near the bottom of your plant, you will see thin, wispy, weak growth. Cut those down. They will take up energy that your plant could use for blooms.
Look for any dead stumps on your stems. They will not have grown any new wood or buds out of the original old wood. Cut the dead stumps down to their base to completely remove them. This will allow the new growth underneath to have a chance to succeed.
Dead and old blooms need to be removed to make room for new buds to come through. Cut the flower head off right above the first few leaves to encourage blooms for the next summer.
Stand back from the plant and observe its shape. You’ll want to prune the shrub into the shape you prefer, a sphere is the typical style but you could prune it into any shape you want!
Clean the Debris
Remove any debris that fell off from the base of the plant. You want to make sure your soil is free of any weeds, leaves and dead flowers.
Fertilize
If you’re growing blue hydrangeas, feed with Holly-tone to keep the soil acidic and the blooms bright. Otherwise, opt for Flower-tone.
For the best hydrangea care, feed 2-3 times throughout the growing season, which is from spring until fall.
Follow these few steps and your hydrangeas will be happy and vibrant for years to come.
Put on your garden shoes, gloves and hat. It’s time to get back outside and tend to your yard. It missed you and suffered during the August heat. Ugh! Poor, poor yards.
FALL TO DO:
•Fertilize all trees, shrubs & perennial flowers with one of Espoma’s “Tones” at half the rate instructed on the bag.
•Use Plant-Tone for most deciduous shrubs except Hydrangeas. Use on Arborvitae & Boxwood.
•Use Plant-Tone for all perennial flowers.
•Use Holly-Tone for all evergreen shrubs such as Rhododendrons, Azaleas, & Andromeda.
•Use Holly-Tone for all evergreen trees & Dogwood trees.
•Use Tree-Tone for most deciduous trees such as Cherry, Maple, & Fruit trees.
•Fertilize the lawn:
•Use Greenview’s Lawn Food in the green bag for a great conventional choice.
•Use Espoma’s Summer Revitalizer if you want a boost of Iron for quick green-up.
A good organic choice:
•Use Espoma’s Organic All Season Lawn Food to help with summer recovery.
•Seed the lawn:
•Now is the perfect time to seed. Warm soil and cooler nights make for quick seed germination.
•Start a new lawn or thicken up an existing lawn.
•Use Van Wilgen’s Premium grass seed.
•Use Greenview’s Starter Fertilizer in the blue bag or Espoma’s Organic Lawn Starter.
• Begin Veggie garden clean up:
•Get rid of any dead plant debris.
•Purchase a cover crop of Winter Rye, Buckwheat, or Clover.
•Refresh soil with Espoma’s Garden-Tone.
•Apply Garden Lime in all beds except for where potatoes are planted.
•Think about bringing houseplants inside:
•Spray all plants with Bonide’s All Season Horticultural Oil or Neem Oil before
bringing indoors to control hitchhiking insects.
•Treat all non-edible plants with Bonide’s Systemic Houseplant Food.
• Fertilize all houseplants. There are many good choices:
•Conventional: Van Wilgen’s All-Purpose Slow Release Plant Food, Van Wilgen’s All Purpose Water Soluble Plant Food, VanWilgen’s Root Boost, or Bonide’s Liquid Plant Food.
Now your chores are done. Kick off your garden shoes and relax! Come see us at Van Wilgen’s. We would love to help.
The best time to plant a tree or shrub is in the fall. A well-placed tree will cool your home in summer and block cold winter winds. Not to mention that the aesthetics can increase your home’s curb appeal and add value.
Even though you may be prepping for winter, you can still set your new tree or shrub up for success by planting it in a spot where it can thrive for generations to come.
Decide on the right tree for your yard and needs before you plant. Choose a tree based on the characteristics you want — shade, wildlife habitat, privacy or to block the wind.
6 Easy Steps to Plant a Tree or Shrub
You’ve found the right tree and the perfect spot, now it’s time for the fun part. It doesn’t take much to plant a tree — just a shovel, tape measure, and hose. To help your new tree survive, you’ll need to put in the extra effort. Use these tips to help your new tree to grow.
- Size up your yard for the perfect spot. Take the amount of sunlight, ground vegetation, and hazards like wires or pipes into consideration. Plant at least 15 feet away from your house, sidewalks, driveways, and other trees. Allocate enough space in the yard for your new tree to grow. Consider its mature height, crown spread, and root space. A fully grown tree will take up much more space than your tiny sapling. Look up to make sure a fully grown tree won’t interfere with anything overhead.
- Start digging. Dig a hole twice as wide and the same depth as the root ball. Then, arrange the tree at the same depth it was growing before and fill half the hole with compost, Van Wilgen’s Premium Planting Mix, or Espoma Organic All Purpose Garden Soil.
- Give trees a boost. Mix in organic fertilizer with the soil. For a trunk diameter up to 1.5 inches, use 4 pounds of Tree-tone. If the trunk is 2-3”, use 4 pounds of Tree-tone per inch. So, if your tree trunk is 2.5 inches, use 10 pounds of Tree-tone. And, for tree trunks over 3 inches, use 5 pounds of Espoma Tree-Tone per inch.
- Stake the tree. Use two opposing, flexible ties to stake the tree. Place ties on the lower half of the tree to allow trunk movement.
- Help your new tree become established by watering it weekly for the first two years.
- Finish with mulch. Use 2 ½ -3 inches of shredded hardwood or leaf mulch around the plant. Do not over-mulch up to the trunk or “volcano” mulch. This can kill the tree.
Planting a tree is an investment in your home and your community that will pay off for years to come.
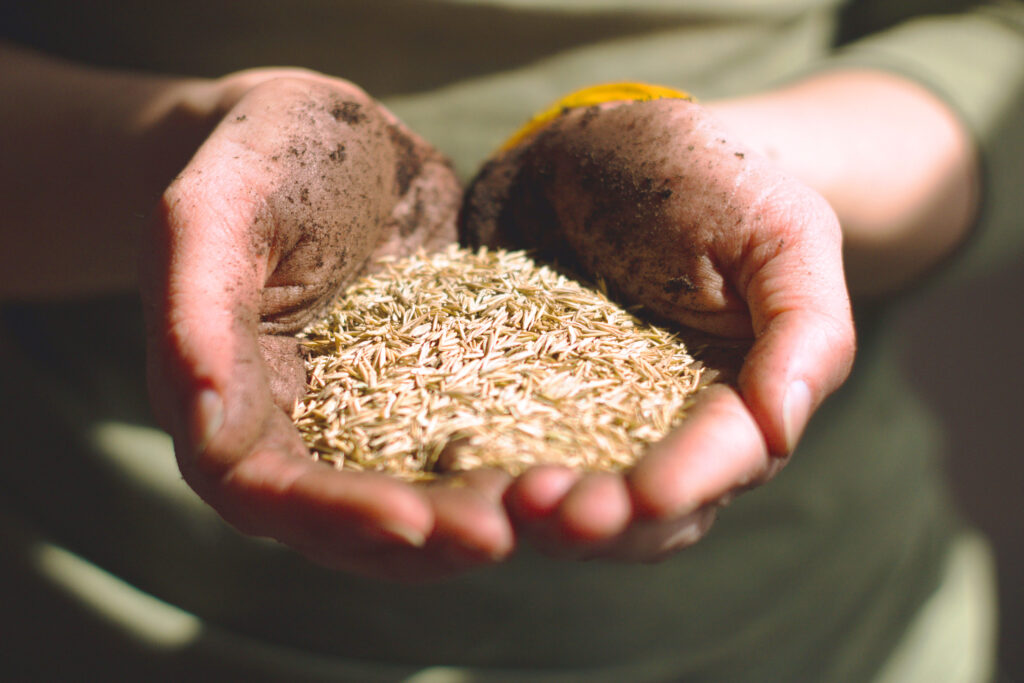
Are thinking of planting a new lawn or just filling in your existing one? Don’t just think about it, do it! I am a huge fan of seeding, whether it is a brand new lawn, filling in bare patches, or thickening up your existing turf, now is the perfect time to tackle this project. Put a little sweat into your lawn. Mow, rake, aerate, seed, fertilize, and water… it is so worth it!
When doing a seeding project all of the above steps are important, but water is the key. If you are thirsty, so is your grass seed. Sounds silly? I am serious. The thirstier you are on any given day, the quicker your grass seed is drying out. Water is the difference between success and failure, so it’s important to do it right the first time!
So, you just went to the refrigerator to get yourself another glass of ________(Fill in the blank with your beverage of choice.) This should be your signal to head outside and check your new grass seed. If it is dry, give it some water. Grass seed needs to stay moist every day. If it dries out, the seed will not even have a chance to split open. Grass seed is close to the surface so it can germinate, this is where the soil needs to stay damp. The top layer of soil can dry out quickly. The sunnier and windier the day is, the quicker the seed dries out. New seed does not need to be watered long, 30 minutes is usually sufficient. However, you may need to water 2X’s in a day. The sunnier the spot is, the more water it needs. Areas along driveways, walkways, curbs, and slopes tend to dry out quicker. Be sure to give these spots a little extra attention.
Is there a better time to water than others? Of course, there is. Morning is the best time to water, but the afternoon is acceptable too. The fall is the perfect time to seed because the soil is warm and nights are getting cooler, leaving a nice coating of morning dew. There may occasionally be enough dew to get you off the hook from watering! Be careful though, if it gets sunny through the day, the lawn may dry out quickly and need another watering in the afternoon. Try to avoid watering at all in the evening, however, if that is the only time you have to do it, then evening water is better than no water at all. New seedlings can get a disease called Pythium, which can wipe them out in a day if the seedlings remain too wet through the night.
Note: There is such a thing as over-watering. If you over-water your new seed, the seed may rot, wash away, or float above the soil. Be careful not to leave puddles or make mud pies out of your lawn. If this is the case, you are being too good of a caregiver of your newly seeded lawn.
It is a good idea to cover the seed with mulch. I really like Mainely Mulch. It is a weed-free straw/hay combo that covers new seeds nicely, holding in moisture, keeping birds from eating the seed, and slowing down erosion. The best thing about Mainely Mulch is you do not have to rake it up after the grass grows. It will biodegrade into the soil, adding a little bit of organic matter. A little extra bonus! Greenview’s Seed Accelerator is my favorite for smaller patches. It is a recycled paper mulch pellet with built-in starter fertilizer. You sprinkle the pellets right over the grass seed and water them in. They expand, hold in moisture, and fertilize at the same time!
Don’t be fooled. Just when you think you are done watering your new grass seed, you may have to keep going. Different types of grass germinate at different rates. Perennial Ryegrass is your quickest one to sprout, coming up in 5 to 7 days if conditions are right. Kentucky Blue is a beauty but you have to be patient since it can take up to 25 days to see any germination. Please do not stop watering just because you see a few green sprouts… There are a lot more to come.
Here is my rule of 3 for newly seeded lawns: In the first 3 weeks, water your grass seed 2 times per day for approximately 30 minutes. In the second 3 weeks, water your lawn, 3 times per week for a longer period of time, approximately 45 minutes to 1 hour. This will encourage a deeper root system and a much healthier lawn. Give your lawn one last treat around Thanksgiving. Feed it with a Fall lawn fertilizer by Greenview or Espoma. It will go to bed happy and healthy for its long winter nap.
Lawn & Plant Care